Objective- The goal of this activity is to learn how to construct a simple electric circuit to light up a bulb and to draw a diagram of the circuit using standard symbols for its components.
Concepts to Understand-
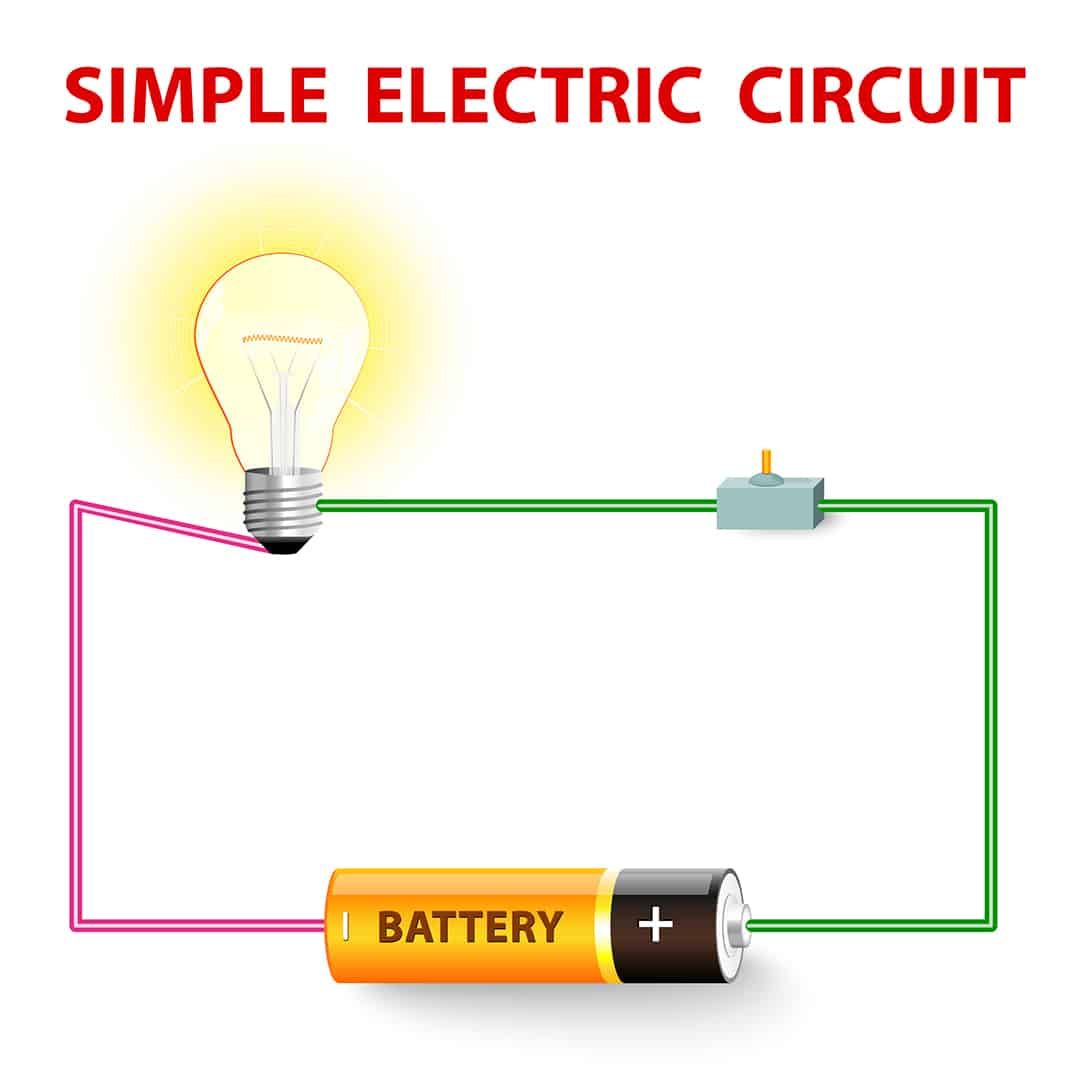
- Electric Circuit- It’s a path through which electric current can flow. In this activity, we create a closed circuit, meaning the path is complete, allowing electricity to flow through it.
- Electric Components- These include a bulb, a switch, wires, and a cell (battery). Each component plays a role in the circuit.
Steps to Follow-
Gather the Components-
- An electric cell- This is your power source.
- An electric bulb- This will light up when the circuit is complete.
- A switch- This controls whether the circuit is open or closed.
- Connecting wires- These create the path for the electric current.
Construct the Circuit-
- Connect one end of a wire to the positive terminal of the cell.
- Attach the other end of this wire to one terminal of the switch.
- Connect a second wire to the other terminal of the switch.
- Attach this wire’s other end to one terminal of the bulb.
- Finally, connect a third wire from the other terminal of the bulb back to the negative terminal of the cell.
- Ensure all connections are secure.
Test the Circuit-
- Close the switch (put it in the ‘ON’ position).
- Observe if the bulb lights up. If it does, your circuit is correctly set up.
Drawing the Circuit Diagram-
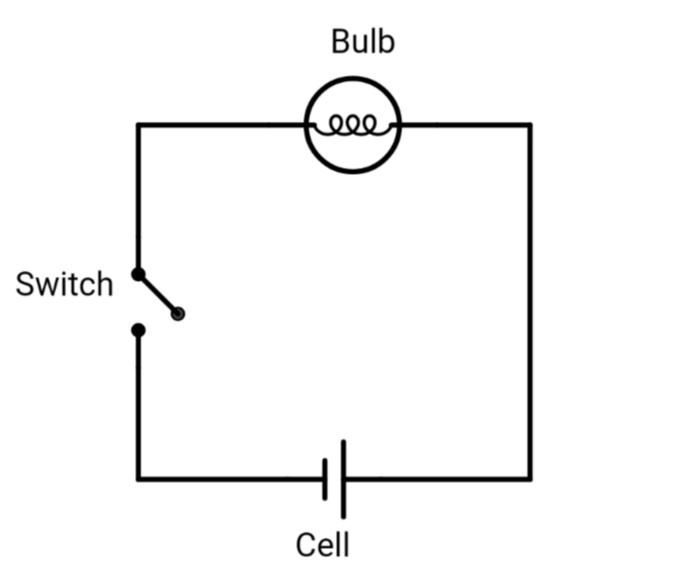
- Use standard symbols to represent each component-
- A simple circle for the bulb.
- A straight line with a semi-circle bump for the switch.
- Lines for wires.
- A pair of parallel lines (one longer than the other) for the cell.
- Draw these symbols in the same arrangement as your actual circuit.
Understanding the Concept-
- When the switch is in the ‘ON’ position, it completes the circuit, allowing electric current to flow from the cell through the wires and the bulb, causing the bulb to glow.
- When the switch is ‘OFF’, the circuit is open, and no current flows, so the bulb doesn’t light up.
Conclusion-
Through this activity, students understand the basics of constructing an electric circuit and the role of each component. They also learn to use standard symbols to represent different parts of a circuit in a diagram, which is an essential skill in understanding and communicating electrical concepts.
Also Check – Chapter 10: A Detailed Guide to “Electric Current and its Effects” Activities for Class 7 Students
Also Check- Electromagnets- A Guide for Upper Primary Students
Also Check- Chapter 10 – Electric Current and its Effects – 5 Worksheets Solved and Unsolved
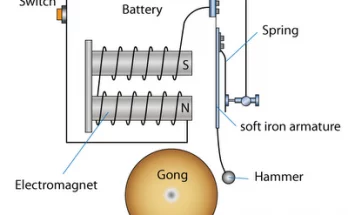
Also Check- Electric Bell Diagram for Class 7 Science
Also Check- Rapid Revision – Class 7 Science- Chapter 14 – Electric Current and Its Effects
Also Check- Chapter 14- Electric Current and Its Effects-Class 7 science- Question and Answers
Also Check- Chapter 14- Electric Current and Its Effects–Class 7 science- Question and Answer -(Solved MCQs)
Also Check- NCERT Exemplar Solutions- Class 7 Science- Chapter 14 – Electric Current and Its Effects
Also Check- NCERT Solutions for Class 7 Science Chapter 14- Electric Current and its Effects
Also Check- Class 7 science -Chapter 14 – Electric Current and Its Effects- Complete Notes
Also Check – Electric Bell Working Mechanism Simplified for Students
Also Check- Batteries- The Powerhouses of Everyday Life – A Guide for Upper Primary Students